Friday, October 31, 2008

Obama Halloween Candy Analogy

Happy Halloween! And what's Halloween without one of the scariest things known to man, politics! The other day I heard an analogy of Obama's "spread the wealth" plan, with Halloween candy, so here it is.

A group of children has been trick-or-treating for almost two hours and they are getting tired, but they have bags full of candy for their work. They come upon a house, and knock on the door. The man who answers it asks them how much candy they have gotten. Excitedly they show him all their candy, saying they have been working hard for it, and they cannot wait to get home and eat it. However, the man, instead of giving them more candy, asks each of the kids for half of their candy, so he can give it to all the kids who did not go trick-or-treating. The kids of course do not like this idea, and quickly run away.

Tuesday, October 28, 2008

New Hard Drive

I decided to buy a new hard drive after I had run low on space, which I define as less than 10GB of free space, on my old drive. This would be second upgrade to my laptop. My last upgrade had been from 120GB to 160GB, both SATA 1.5Gbit/s at 5400RPM. (My 160GB would have been 3.0Gbit/s, but thanks to the lack of technical knowledge of HP's tech support, I was not sure if my computer could take it.) So this time I figured I better get more than I think I will need, so I will not have to upgrade again during my computer's lifetime.

After looking through prices of different manufacturers and their hard drives, I decided to go with a Western Digital (A somewhat biased decision) 320GB 7200RPM SATA3.0Gbit/s with a free-fall sensor (WD3200BJKT). (HP was able to tell me what I wanted to know after the second try this time.) Because I may drop my laptop one day, and the sensor only cost a little more compared to the one without. After ordering my hard drive online from provantage.com, it took only 3 days to arrive at my house.

Using a 2.5" external enclosure, I copied the contents from my old hard drive to my new one using Norton Ghost. However, while doing this I assigned the new drive's letter as H: in Vista, which turned out to be a dumb move. Once I had finished copying my old drive, I shut down my computer, took the old one out, and put the new one in. I turned on my computer and Vista boot up, but once it had, I ran into trouble. Vista would load almost nothing after its initial start, as everything was stored on C:, according to Windows, and I had marked my new drive as H:. I then spent the next three hours digging through my brain and futilely trying all I could think of to change the drive letter as it was assigned in Vista. I knew how to do so if I was given a command prompt, but I couldn't get one as Vista would search C: for explorer.exe and cmd.exe, and C: wasn't there. I finally decided I would try to copy my old drive again, giving Vista no knowledge of the new drives existence. I switched the drives in my computer and again copied my old drive to my new one using CloneZilla. When I started Vista with the new drive in again, it worked perfectly.

After feeling like an idiot by making a simple, but problematic mistake when coping my drive, I was ready to benchmark my new one against my old one. I had already benchmarked my old drive using PC Wizard 2008 and HD Tune, running both twice. I went ahead and benchmarked my new hard drive in the same way. All HD Tune benchmarks were done with Windows running in safe mode, to minimize other programs using the disk. I have posted the results below.

I have been using my new drive since the 24th, and I am very pleased with it and have found no problems, except the ones I caused. The speed increase is noticeable in everyday use, and having double the space I used to have is very liberating. Thank you Western Digital and provantage.com

Old:

HD Tune 1: http://img411.imageshack.us/img411/4142/1sthdtunebenchmarkwdcwdqa3.png

HD Tune 2: http://img367.imageshack.us/img367/9448/2ndhdtunebenchmarkwdcwdrs9.png

PC Wizard 1: http://img243.imageshack.us/img243/5872/old1ee5.png

PC Wizard 2: http://img367.imageshack.us/img367/4854/old2qv6.png


New:

HD Tune 1: http://img119.imageshack.us/img119/7852/1sthdtunebenchmarkwdcwdde0.png

HD Tune 2: http://img119.imageshack.us/img119/8168/2ndhdtunebenchmarkwdcwdav9.png

PC Wizard 1: http://img243.imageshack.us/img243/2391/new1ys3.png

PC Wizard 2: http://img367.imageshack.us/img367/8379/new2on3.png

Thursday, October 23, 2008

Happy National Mole Day

From 6:02AM to 6:02PM today is National Mole Day! Some of you may be wondering why it is only 6:02AM to 6:02PM. Well, this Mole Day is not about the moles that dig up your yard, it is about the moles that make up matter, and a mole is approximately 6.02 x 10²³ atoms or molecules, depending on which you are measuring. So, if you write the date as time then month then day, you get 6:02 10/23, which is like 6.02 x 10²³, this is why National Mole Day only lasts from 6:02AM to 6:02PM. So to celebrate, go get some concentrated sulfuric acid, H2SO4, and sucrose (sugar), C12H22O11, then put them together and make some solid carbon!* I won't go into detail why this happens, for I don't entirely know, but sulfuric acid will combine with water, and since sucrose has twice as many Hydrogen atoms as it does Oxygen atoms, just like water, it's like carbon and water. The sulfuric acid will rip the water from the sucrose, leaving separated carbon and water. The water will then boil off as steam, for this reaction is very hot, and the carbon will become a porous piece of solid carbon. So there is your simple, incomplete chemistry example.


*I suggest that you do not actually go and do this. In the event you go and do this and end up hurting yourself or someone else, I cannot be held responsible in any way. If you do this, then you do so at your own risk. Again, I am not responsible in any way at all for anything that may happen if you do this. This includes, but is not exclusive to, causing you or another being harm, or any property damage that may result.

Tuesday, October 21, 2008

Folding

Objects abilities to fold up are usually taken for granted, as it has become very common for an object to fold up. Scooters fold up, computers fold up, puzzles can fold up, a few trailers can fold up, glasses fold up, some flying discs fold up, ironing boards fold up, knives fold up, tool sets fold up, tricycles fold up, tents fold up, and I think you get the idea. Nevertheless, this next item is still surprising to me. It is a good idea, and I am surprised it was not thought of sooner; Microsoft has developed a fold up, wireless computer mouse. It folds up to 60% of its original size to save a little space for portability, and then one can un fold it to get a full sized desktop mouse. I do not see how that little of a size difference could matter, but someone will buy it.

While writing this article I did find a fold up mouse from Japan, so Microsoft isn't the first to do it, but theirs will probably be used more, and I think it looks more comfortable, and looks better.

Global Anti-Piracy Day

Today is Global Anti-Piracy Day hosted by Microsoft. Anti-Piracy Day's goal is to educated people about illegal, pirated software, and to enforce current piracy laws. Some people who attended the educational events learned that they had unintentionally purchased counterfeit versions of Windows through auction sites, even after being told they were a genuine version. Microsoft reimbursed these people with genuine versions of Windows, and many of them appear to be pleased by this action. Action was also taken against resellers in multiple countries that had been selling illegal copies of Windows and Office.

Global Anti-Piracy Day Virtual Pressroom


Microsoft DreamSpark

I recently read that Microsoft was offering some of their development software free to students. I got excited when I read this, but when I went to the Microsoft site, in order to verify I was a student, I had to be going to one of the colleges they had listed. I am not in college and I almost gave up, but I saw a link to an alternate verification method. Luckily, high school students are able to participate in this program thorough the alternate verification. So I went and verified myself, and now I am legally downloading professional software from Microsoft free. Thanks a ton Microsoft! To go and download this stuff yourself, go to https://downloads.channel8.msdn.com/.

Wednesday, October 15, 2008

Green Glass Dodecahedrons

I started working on making a frame from my Dodecahedron Rain into a nice still image with glass dodecahedrons and a floor texture two days ago. First, I had to work on putting a material on the dodecahedrons, and this was new to me, since I had used a dynamic simulation to clone the objects, instead of a normal clone operator. I will not go into deep details, but it took me a little while to get the material to work because of the odd configuration. After I learned how to get a material on a dynamically cloned object, I had to find the material I wanted, and then configure and fine-tune it to suit my needs. Once I had done this, I found a frame that looked like it would make a nice still image. I then set up the lighting, using one point light to generate photons for caustics, and an area light for shadows and normal lighting. With the lighting all ready to go, I went ahead and generated a photon map. Luckily, I was familiar with the controls and this took little time to configure. After I let to photon map render, I double-checked all the settings, saw I was ready for a final render, and started rendering.

As of this writing 53% of the image has been rendered and the rest is still being rendered. When I set up the scene, I knew it would take a long time to render, since I allowed a maximum of 10 reflections and 10 refractions for the glass material, and there are a few groups of multiple glass objects in the scene. Tracing a light ray through multiple reflections and refraction can be computer intensive. However, I never expected a time as long as this; it has been rendering for 17 hours as of this writing. I also think that the second half of this image will take longer to make, because there are more glass dodecahedrons in it. Therefore, it could be another 24 hours at least before I get a finished image. The first half looks good, so I am assuming the rest will.

UPDATE: It has now been 33 hours and 30 minutes since I started rendering this image, and it is 73% done.

UPDATE 2: 36 hours after rendering start, the image is 85% complete, and I think there are no more densely populated parts of the image, so it should be done by this afternoon; in roughly 6-10 hours.

I hope that nothing happens while the image is rendering, as it is going only to my RAM, and not onto my hard drive. This might not have been the best decision, but I wanted to be able to look at the image while it was being rendered, and as far as I know, I can only do this without saving it to my hard drive as it is rendered. If I were saving it to my hard drive as it rendered, and something crashed, I would at least have half an image, and I could just render the rest of it, instead of all of it again. I am hoping that sometime I will find out how to make mantra, the rendering program, output to two places, such as a live view, and a file on the hard drive.

On a side note, my laptop processor has been overclocked by 21% this whole time, so I guess this is a nice stress test too, and so far, my processor is passing. Although the temperature is getting high, with one core at 78°-80°C (172°-176°F) and the second core at 74°-76°C (166°F-169°F), assuming my temperature readings are correct, which I believe they are.

FINAL UPDATE: After a hot (for my processor) 38 hours, the image is finally done. I will post it soon. I was surprised at how fast my processor temperature dropped; it went down 20°-25°C in about 3 minutes.

To see the final render, go to http://flickr.com/photos/heydabop/2947837408/.

Saturday, October 11, 2008

Houdini’s RBD Simulation

After doing many complicated (to me) projects, I chose to do something simple that I assumed would not take long to set up, a simple Rigid Body Dynamics simulation. It consists solely of dodecahedrons being generated at random spots and falling to the ground. It took only fifteen minutes to calculate the 600 frames of the animation. It could have done it even faster, but it saved every frame to disk, which apparently takes a lot of time to do, because the first 31 frames took a minute, yet I can make it calculate the first frames in real time at over 24 FPS if I don't save to disk. I rendered it at a low quality, since it is not anything special in the first place.

Final Video: http://vimeo.com/1942465

I might do a single frame render later on, where all of the dodecahedrons are glass, with a floor texture, better shadows, and a higher resolution.

Friday, October 10, 2008

Collisions 2

After posting my problem that I explained in my last entry in the Side Effects forums, I received an answer from Allegro, who I believe is a Side Effects employee. From what I have seen of Allegro's posts, he seems to know what he's talking about. So I read through what he had posted, understanding most of it. I could not look at the file attached to his post, as I was short on time.

I returned later and downloaded his file. I opened it to find a high quality collision mesh of my geometry. Pleased with what Allegro had made I went on to fine tune my fluid simulation. After computing the simulation, I then foolishly rendered it without actually watching it all of it. I had to do some test renders of the first frame to get lighting down, and get a good render time to quality ratio. After I set up the lighting and render quality, I rendered all of the simulation. I kept checking on my computer every few minutes to see how far it was, and see if everything looked good. It took about two hours to render, and once it was done, I played the finished sequence. I was not happy with what I saw. You could only see the water drop in two frames of the 24 FPS sequence, and it settled in its container in about ten frames. Frustrated with myself for not checking my simulation before I rendered it, I started to think about how to slow down the drop. However, I quickly decided to work on it later. So far, all I have thought of doing is increasing the scene's scale. I will see how that works in a day or two.

Thanks for fixing my collision mesh, Allegro.

Collision Thread: http://www.sidefx.com/index.php?option=com_forum&Itemid=172&page=viewtopic&t=13588

Collisions

I have been trying to make a scene in Houdini where a drop of water falls about three meters, and then splashes into an oddly shaped container. It has not been going as well as I would have hoped. First, I had to make it so the particles were not being formed uniformly, because then I would get a uniform splash and it would look fake. Looking though controls on the emitter node for a little while solved that problem when I found jitter. I then added drag to the particles, and I was inexperienced with drag, so that took a little learning too.

Now, most of these problems I have just listed were not too big, and were easy to solve. However, I have one big problem that has been hounding me throughout this whole project, and I have yet found a way to solve it. The container that the drop of water is falling into is not a simple or normally shaped container. It looks somewhat like a modern squashed glass vase. This is hard to represent well in a collision mesh, and still being relatively new to Houdini, I am having trouble doing so. It would be easier if I did not have to represent interior features, but I do, or else the container is not container, and is then worthless. I have been using the trial and error method, but this is not the best method, since each collision geometry takes anywhere from 30 minutes to 3 hours to generate. So, I have posted my problem on the Side Effects Houdini Forums, which is full of great, helpful people, and hoping someone there knows a way to get an accurate collision mesh for my geometry.

Container: http://img56.imageshack.us/img56/5651/containeret0.png

Resulting Collision Geometry: http://img56.imageshack.us/img56/9083/collisiongeometrydr3.png

Tuesday, October 7, 2008

Global Illumination

Over the past three days, I have been doing a little work on Global Illumination in Houdini. I made a scene with bright colors to emphasize the diffuse reflections. I had to do a lot of tweaking to get a result that was similar to what I wanted, still not exactly what I want though. So here they are.


This is my first try. The main problems with it are the red boxes reflection to the right is to bright and has weird edges, and the texture on the tube is weird and has a seam on the right side of the image. Other than that, it came out decent.

http://flickr.com/photos/heydabop/2923490110/


For my second render, I changed the lighting upped the photon count to 1,000,000. I also added in caustic calculation to help keep the Global Illumination from being over lit, as with the reflection in the last image. The caustics are not rendered in the final image. In lighting, I went from one spot light, to four spot lights, creating a square behind the camera.

http://flickr.com/photos/heydabop/2923495580/


I decided to change the tube's texture in the third render, since I am too inexperienced to get the UV projection I wanted, I just went with a homogeneous texture. Same lighting and photon count as in the last image. I am going to render this again, but get rid of the bronze tint from the tube, as it does not suit my tastes. One thing I found interesting in this was the purple reflection in the blue box. The only thing I can guess is that the red box is reflected on the back of the tube, which reflects on the blue box.

http://flickr.com/photos/heydabop/2922647089/

Sunday, October 5, 2008

Same Torus, New Light

I decided I go ahead and try to re make the Glass Torus scene in Houdini. I chose to leave out a floor texture because I couldn't find one that I thought looked good, and it greatly increased render time and photon map generation time. However, I changed the lighting in the scene to get better looking shadows. I used a spot light for photon map generation, and I used a grid area light for shadows. It took about thirty minutes to generate the photon map for caustics, and then 11 hours to render the image. I like it how it looks; I just hope other people do. It's simple, yet still looks good. Any intelligent suggestions or criticisms are welcome.


http://flickr.com/photos/heydabop/2912048362/


Now that I've finished this I'm going to try a scene with prominent Global Illumination.

Friday, October 3, 2008

Recap; Side Effects Houdini Apprentice HD

As you can see, what I predicted when I started this blog happened to some extent. I got lazy and did not feel like writing. So here is a quick recap of what happened over the past two months.

Hurricane Gustav hit me hard and parts of it were scary. Streets near my house flooded, and we were without power for 5 days, with is not much compared to many other people hit by Gustav. We had a lot of tree debris to clean up. It took us about 2 weeks to get most of it out of the way.

A week and a half after Gustav hit I went to Disney World. We did not go because of Gustav; we had been planning this trip for almost a year. We spent a week at Disney World, in a Disney resort on Disney property. It was one of the best weeks of my life. I spent 3 days in EPCOT, and one day in every other park except for the water parks, which I never visited. The last time I had been was in 2000, so I remembered a little bit of Disney, but not much. They have changed a lot of stuff too, so most of it was a new experience to me.

Besides those two major events, life has been moving at a normal pace for me.


Now, on to Side Effects Houdini Apprentice HD. Houdini is a 3D animation and modeling program made by Side Effects Software Inc. I stumbled upon it after doing countless searches for software allowing me to do computational fluid dynamics. When I first saw it, I just passed over it, remembering using it a few years ago, and not liking it. This was partly due to my inexperience. After running out of solutions, I finally went back to look at it, and watched some demo reels on it. Amazed by what I saw I decided I had to try it out. I downloaded a free version of it called Houdini Apprentice. It limits your rendering resolution, and puts watermarks on everything you render. After messing with it for a few days and doing some tutorials, I bought Houdini Apprentice HD, which takes off the resolution cap on still images, raises the resolution cap to 1920x1080 on videos, and gets rid of watermarks. I have now owned it for about 2 weeks.

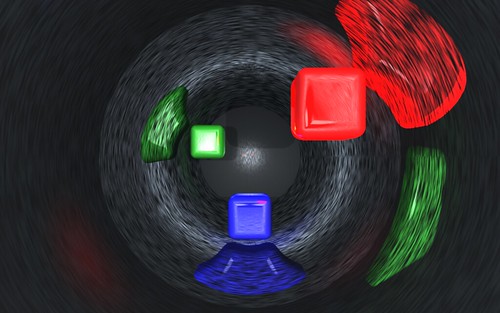
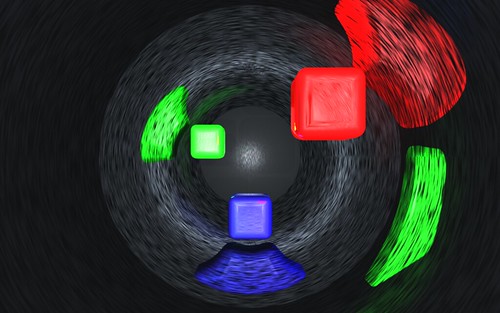
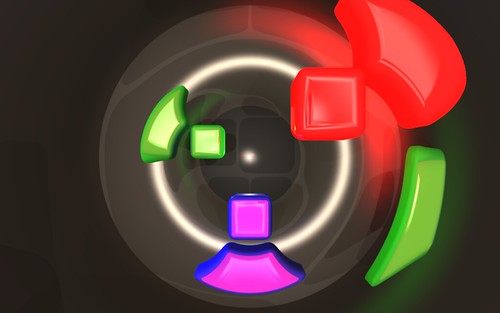
The more I learn about it, the more I realize there is more to learn. It is full of features for almost anything I could need. It does very well with dynamic simulations, but those take a lot of processing power, so I have not done many with my 1.8 GHz AMD Turion 64 X2 over clocked to 2.2 GHz. I am still learning so much about it, and still being impressed by what I see. So far, I have only made two scenes worthy of release into the public domain, portrayed in the thumbnails below. I hope you liked them.


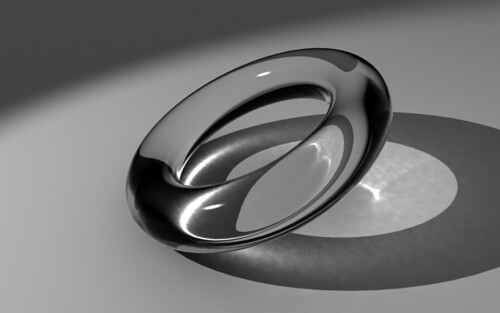
The highlight of this is the use of caustics. Rendering caustics in Houdini proved to be trickier than I had expected. Many times when I rendered it using Physically Based Rendering, not only was there noise created by PBR, but random bright white specks and blocks of pixels would appear. This was not acceptable, so I went posted a topic on the Side Effects forums, and got no response. The forums are very helpful, and have assisted me many times before, but I guess no one knew what was wrong here. So I went looking around for people with similar problems, and while doing this I found a way to render caustics without using PBR. I figured this would at least get rid of noise, so I went ahead and did so. I then rendered the scene again using Micropolygon Rendering, and got what you see here. I plan to render this again, improving caustic count and quality, and make giving the floor texture. However, this will take much longer to render, and I will probably have to leave it over night. Hopefully, the result will be worth it.


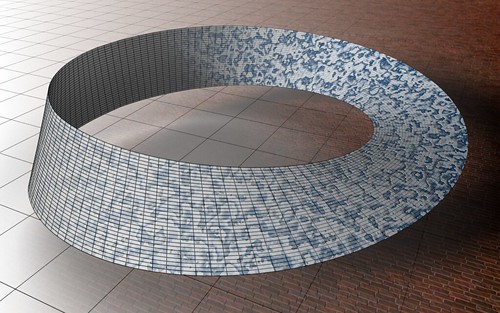
This is the first scene I made for rendering a still image. Making this was a multiple stage process. First, I had to model the Möbius Strip, which included learning how to model objects. After modeling it, I rendered the first image, with the textures and no wireframe, which is what you see on the right of the image. Then I had to go and learn how to do a half-wireframe render. This took some searching on the forums, and combining parts of what I found. Once I was successful in rendering the wire image, I went into Paint.NET and combined it with the first render, and used an alpha gradient to make what you see now.

For more Houdini renders, go to http://flickr.com/photos/heydabop/sets/72157607632268880/.